
This was the first Collab that I participated in, a 5-second animation, 9×16 ratio, it needed to be black, white and a color of my choice, the theme was the Gumdrop group’s first ever anniversary.
I choose to create an After Effect character animation. I started immediately by putting in motion an idea of mine. The concept, rigging, animation, everything. When I finished, I showed Filipe Campeiro the video, who was coordinating the whole project. He said something like: Dude, that’s cool… but it had to be black and white, not just shades of gray!
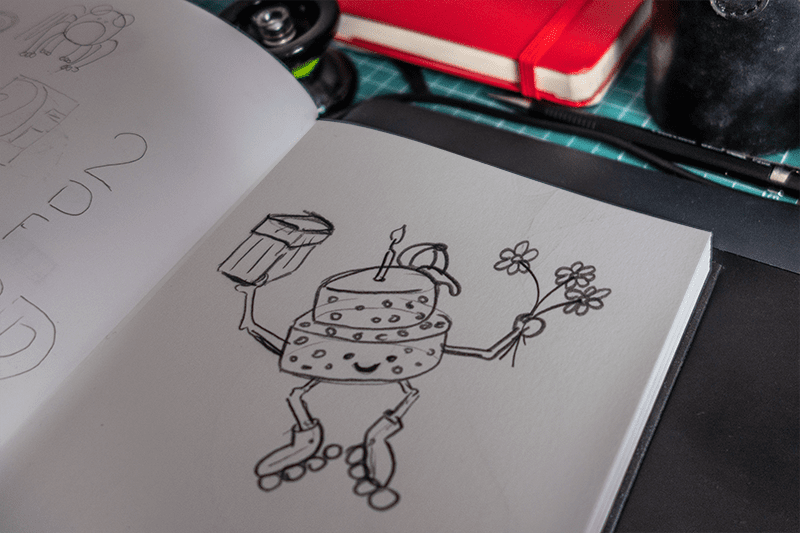
This was my participation in Gumdrop Collab # 3. If we exclude this tiny mistake (I adjusted the colors, it was not 100% perfect but got approved), it was quite nice to be part of this project.
Gumdrop is a group of Brazilian motion designers that gathers a very proficient pack in the most diverse motion fields. 3D, cell animation, character animation, among many others. The collaboration ethos and friendship are quite strong in the group, ensuring an environment of constant growth (and tomfooleries).
When I wanted to join Collab, I was already putting the 2DF Blog together, so I thought I would do it in a way that I could share some of the knowledge used to produce my own animation, as a sort of payback to how much this group has given me.
Inspiration
A while ago I watched a live with James Curran (famous for his gifathons) and the fact that he was not rigging his animations hit me hard, he just did them, the depths of the characters and animations were created under a “go with the flow” mentality, as he is pure talent.
I found that amazing, it inspired me a lot. I was always so focused on creating the perfect rig that I failed to realize how much freedom that same rig can give us.
Another inspiration was the new After Effects’ feature, which makes it possible to link the points of a shape to a null object and the other way around. I had wanted to test this function for a long time.
Adding the fact that Gumdrop is constantly jesting about the use of plugins (everyone uses them, but those who admit it have to deal with some banter), I decided to do my project without using any plugin whatsoever, just the native tools of After Effects.
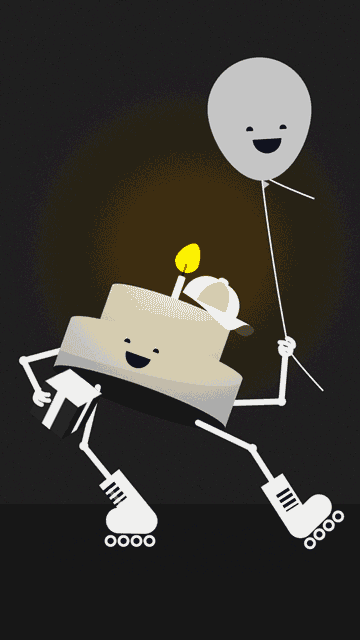
The storyline is “A skating cake that happily dances celebrating the birthday without realizing that it is the party’s main course, its balloon friend is stunned.” This is the result of the romp:
Making Of
I did a time-lapse to better explain the animation’s creating process (please notice that everything is in shades of gray, HAHAHA). I was able to do all the animation without relying on plug-ins, but I just couldn’t manage it without any rigs James Curran-style. I created a basic rig to assist in some animations. I will explain each part a bit more in depth.
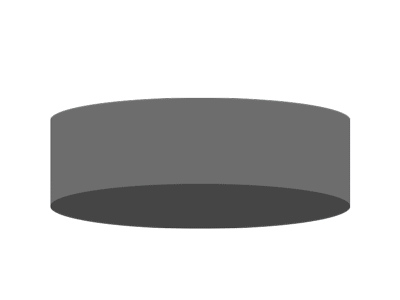
The Cake’s Body
For the animation of the body’s cake, I wanted to create this sense of perspective, the idea that the cake’s body had depth. To achieve that, it was necessary to match a rectangle with some circles with synchronized movements. The color difference has the role of simulating the illumination, thus helping to create this illusion.
To do that, I used an expression through the linear interpolation function. It basically works like Joysticks’ n Sliders and bq_HeadRig, it uses a slider to control several parameters of an animation.
My life changed from the moment I learned the linear interpolation expression. I say that for real, after grasping its role I began to create more complex rigs and easier to use interfaces, allowing me to create products such as Design and Motion Character Kit (sign up for Videohive using this link and I will get 30% of your first purchase at no additional cost to you).
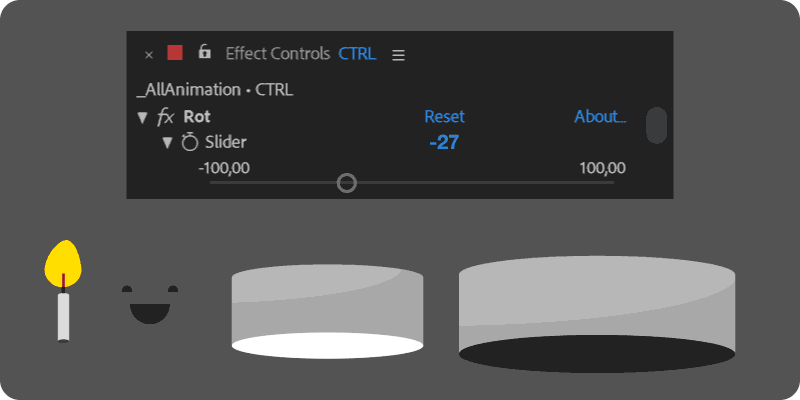
The logic behind it is simple, in my case I used a slider (Effects/Expression Controls/Slider Control) to control the height of circular shapes, which represented the bottom and the top of the cake’s body: If the value of my slider was 100, the height of the circular shapes would be -300. If my slider were equal to -100, my circular shapes would have the height of 300.
m = thisLayer.marker;

Rot=thisComp.layer("CTRL").effect("Rot")("Slider");

pY=linear(Rot,-100,100,300,-300);

[value[0],pY];
I also used a slider to adjust the width, but, in order to keep things more didact here, I excluded that part from the example above. The first line locates the slider and calls it Rot (I chose Rot, you can choose whatever you like when creating a variable). The second line is the one that transforms the value of the slider into the value you want for the shape layer, using the linear expression, 100 turns into -300 and -100 turns into 300. All intermediate values are automatically calculated by the expression.
The third line only applies these expressions to the parameter size of the shape layer, specifically to the value y. This parameter does not accept a negative value, which is very handy, as this makes this layer visible only when the value is greater than zero.
The same logic was used to create each layer of cake, candle, face position and shadows cast on the character.
For the final composition I had to duplicate some layers, since, depending on the body rotation, the order of the layers needed to be changed. The output was a small expression on the opacity of these layers, whenever the slider was equal to or greater than zero the opacity would be 100, otherwise it would be 0.
m = thisLayer.marker;

pT=thisComp.layer("CTRL").effect("Rot")("Slider");

if (pT>=0) 100;

else 0;
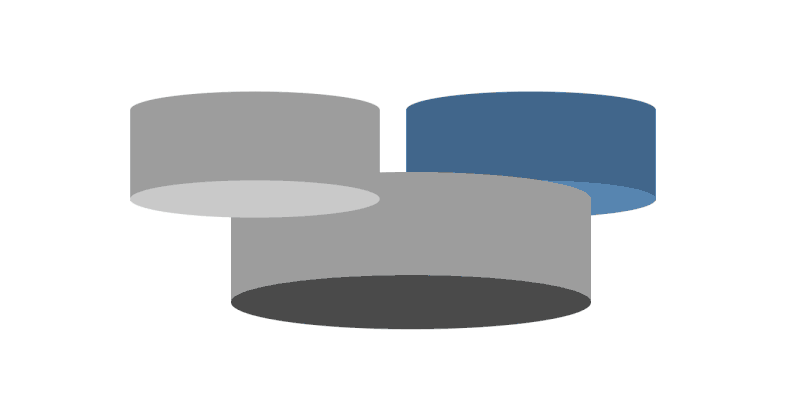
You can see above, the left side is the problem I had. On the right side, the blue layer was positioned below the broader layer of the cake. The green layer above, using the same expression but with inverse values. The expression makes the transparency of these two layers oscillate according to the rotation of the body.
Arms and Legs
Doing the arms and legs without plugins implied having to discard DUIK and RubberHose. Anyone who knows a little bit about After Effects character animation knows that these are almost essential tools.
The solution was to use the brand new After Effects tool: Window/Create Nulls From Path. I sketched the limbs and, with the path of each one of them selected, I used this script that gives you 3 options:
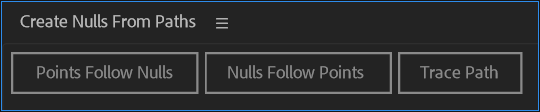
- Nulls Follow Points: A null is created for each point of the path. It follows the animation in the path.
- Trace Path: The AE creates a slider with a null, with it you make the null go through the path using a value from 0 to 100.
- Points Follow Nulls: This option does precisely what I needed. For each point of the path, the script creates a null. It is as if the points of the path were ‘parented’ to the null. When you move the null, the path is animated.
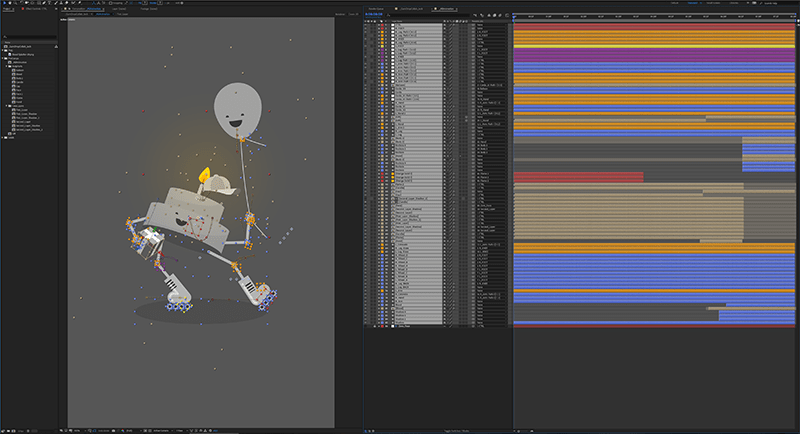
With the nulls already created, I did some circles to depict the knees and elbows and parented them. The hands are strokes parented to these nulls. The skates were created using copies of the stroke with different thicknesses, then cut with trim.
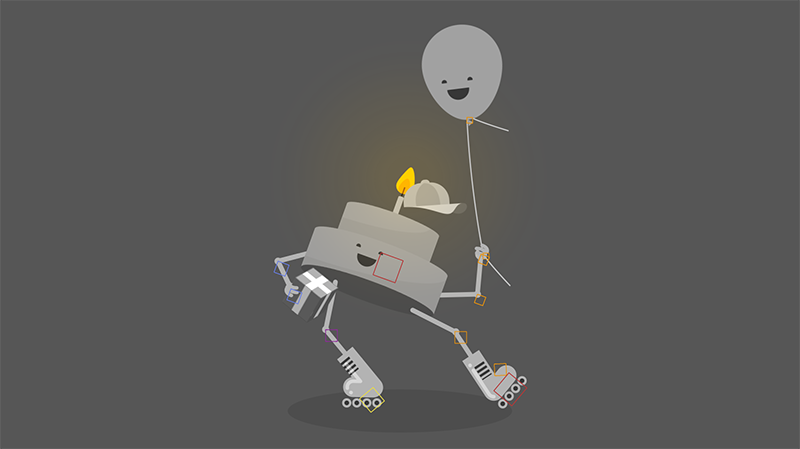
The nulls in the image are controlling points of the shape layer of each member.
3D Gift
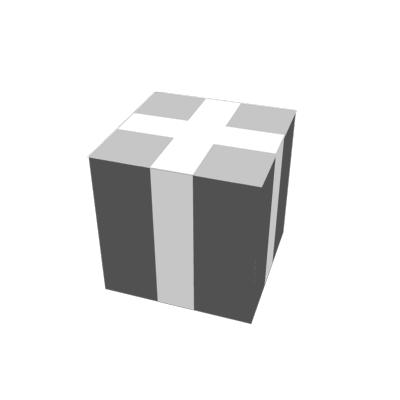
To follow the body’s inherent depth, I opted to make a 3D gift. This was performed right in After Effects.
In a pre-composition I created a squared shape layer, I enabled the 3D option of the layer and set the Z position to -200. I duplicated the layer and I changed the Z position to 200. I duplicated these two layers and I parented in a 3D enabled-null. I rotated this null 90º. By repeating this process, I got a complete cube.
To emphasize the sensation of depth, I varied the color between lighter and darker shades of gray, which simulated the box’s lighting. The strips are copies of these layers with a smaller width.
The gift’s final composition was parented in the character’s hand, with 3D enabled and rasterized. That way I could rotate it directly into the local parameters, without having to access the composition.
The Ballon Friend
To make the balloon string, I used the Points Follow Nulls. I drew the little string using a path. I created the nulls using the script and parented the balloon to it. With that, it was extremely easy for me to animate and create the sense of dynamics for the string.
The part below the little string is a separated path, animated likewise.
Animation
Before I started the animation, I parented the nulls of the character’s legs and arms and created a controller to move the whole character.
I started by animating the body’s position, then the rotation slider. I animated the sliding feet, the facial expressions and everything else. Until the cake drops on the floor.
From that moment, I pre-composed the whole body to be able, through masks, to create the sensation that the cake was being sliced. With this, it was easier for me to separate each part and create the internal pieces.
The flame was made with a shape layer and wave warp.

All other animations were made with simple shape layers, only the apricot cream used a wall photo, provided by noBacks.com.
Learn by trying stuff out
Whenever I had the chance, I loved to ‘tweak’ my colleagues’ project, knowing stuff from them. I learned a lot from that!
Do you need some clarification? Then you can do the same, go through my project and leave your question in the comments, I will be very happy to address it.
The project’s download is available here! (After Effects CC2018 is required)
Final Result
After the delivery is one, there was the expectation to see Collab’s final result. Watching the video already finished is the coolest part because you see what the other artists have done. It’s amazing how the same theme originated so many different ideas.
Watch the Gumdrop Collab #3 below. Remember, it was produced using a 9×16 ratio, the experience gets better when watching it on a mobile phone.
If you enjoyed this tutorial, sign up for my mailing list, whenever I have a new tutorial I will send you an email notifying you.
Jack, 2DeadFrog.


One Response