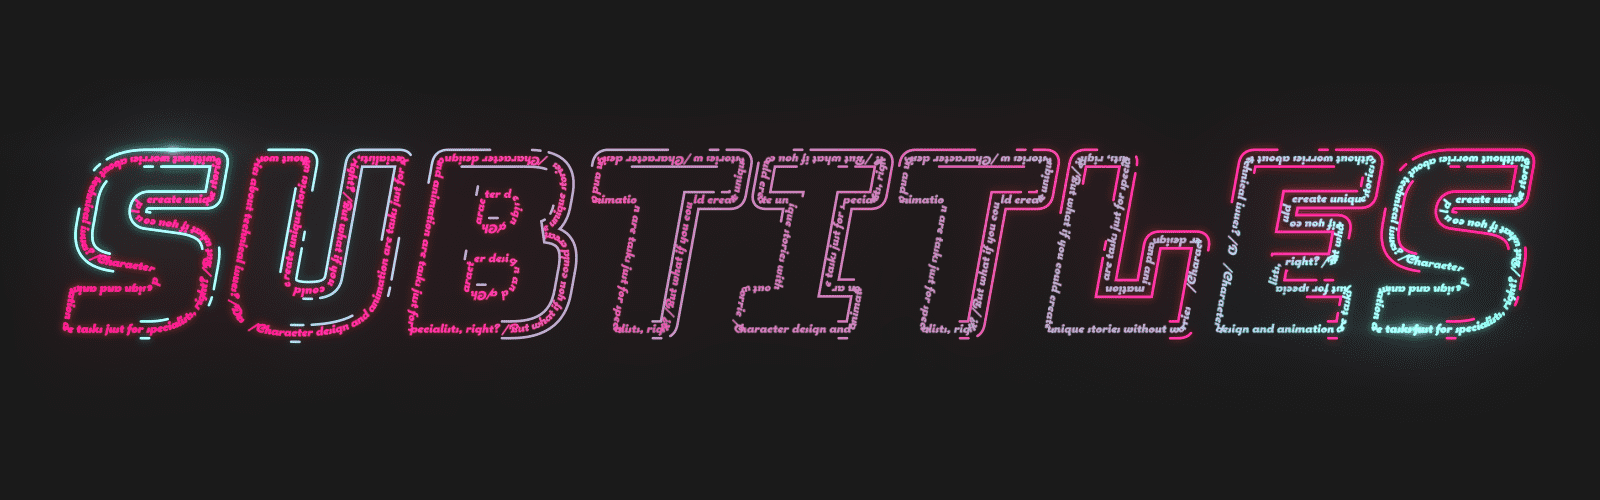
Reinventing Text Animation in After Effects – Tutorial
Reinventing Text Animation in After Effects – Tutorial
Whenever I felt the need to create text animation in After Effects, having total control over that process, I relied on the oldest and most effective solution: separate the text letter by letter in layers and then animate. The problem is that this technique is destructive, once you decompose the text and animate the letters individually, you’ll have to all of this again when you need to change the text. What’s why I created this text animation tutorial in After Effects.
Watch the video version of this tutorial on YouTube!
While I was researching and asking motion designers for help to write this article on solutions to create text animation in After Effects I found that I wasn’t the only one who did it like that. Many After Effects users don’t master or like the text solution that comes with the software. And that’s not the user’s fault, the tool is complicated!
My main question was how to create text animations in After Effects in a fast and intuitive way, while reusing the animation later if you want to. I tried using the text animation tool that comes with After Effects and creating presets, and, albeit powerful, it had nothing intuitive and always fell short to do exactly what I had in mind.
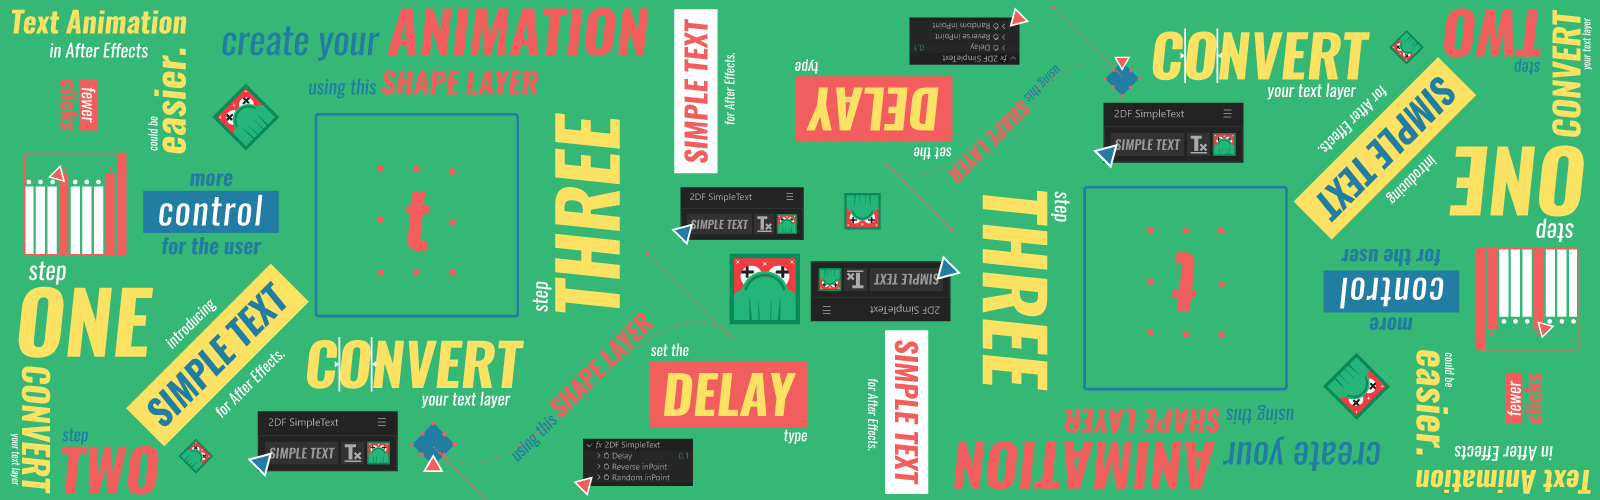
How to create text animations in After Effects quickly and intuitively.
While I was attempting to deal with these issues, I developed this technique that I will now share with you. I found out how to make text animation in After Effects as simple as animating the text letter by letter, although in a more automated, non-destructive and reusable way. Using a shape layer.

THE SOLUTION
The idea is simple: create the animation in a shape layer and transcribe it to the text layer through expressions.

If you like the solution, I’ll make the project available at the end of the article, so that you study, practice and even use it in your work. But, if you want to apply this workflow in your daily life, I suggest you to get to know Simple Text.
It’s an evolution of this project, a script that applies this structure in just one click, with different delay options, and makes it easy to work with multiple animators.
I noticed that this technique becomes much more powerful if there is a practical way to use it, so I created the script. I believe this will change your day-to-day when it comes to text animationin After Effects.
TUTORIAL
Let’s this do step by step. This tutorial is a bit technical, so it’s better if you already have some experience with After Effects and expressions. If you have any questions, please get in touch in the comment section, I’ll be happy to help you.
First step: Create the text layer and add the animation properties
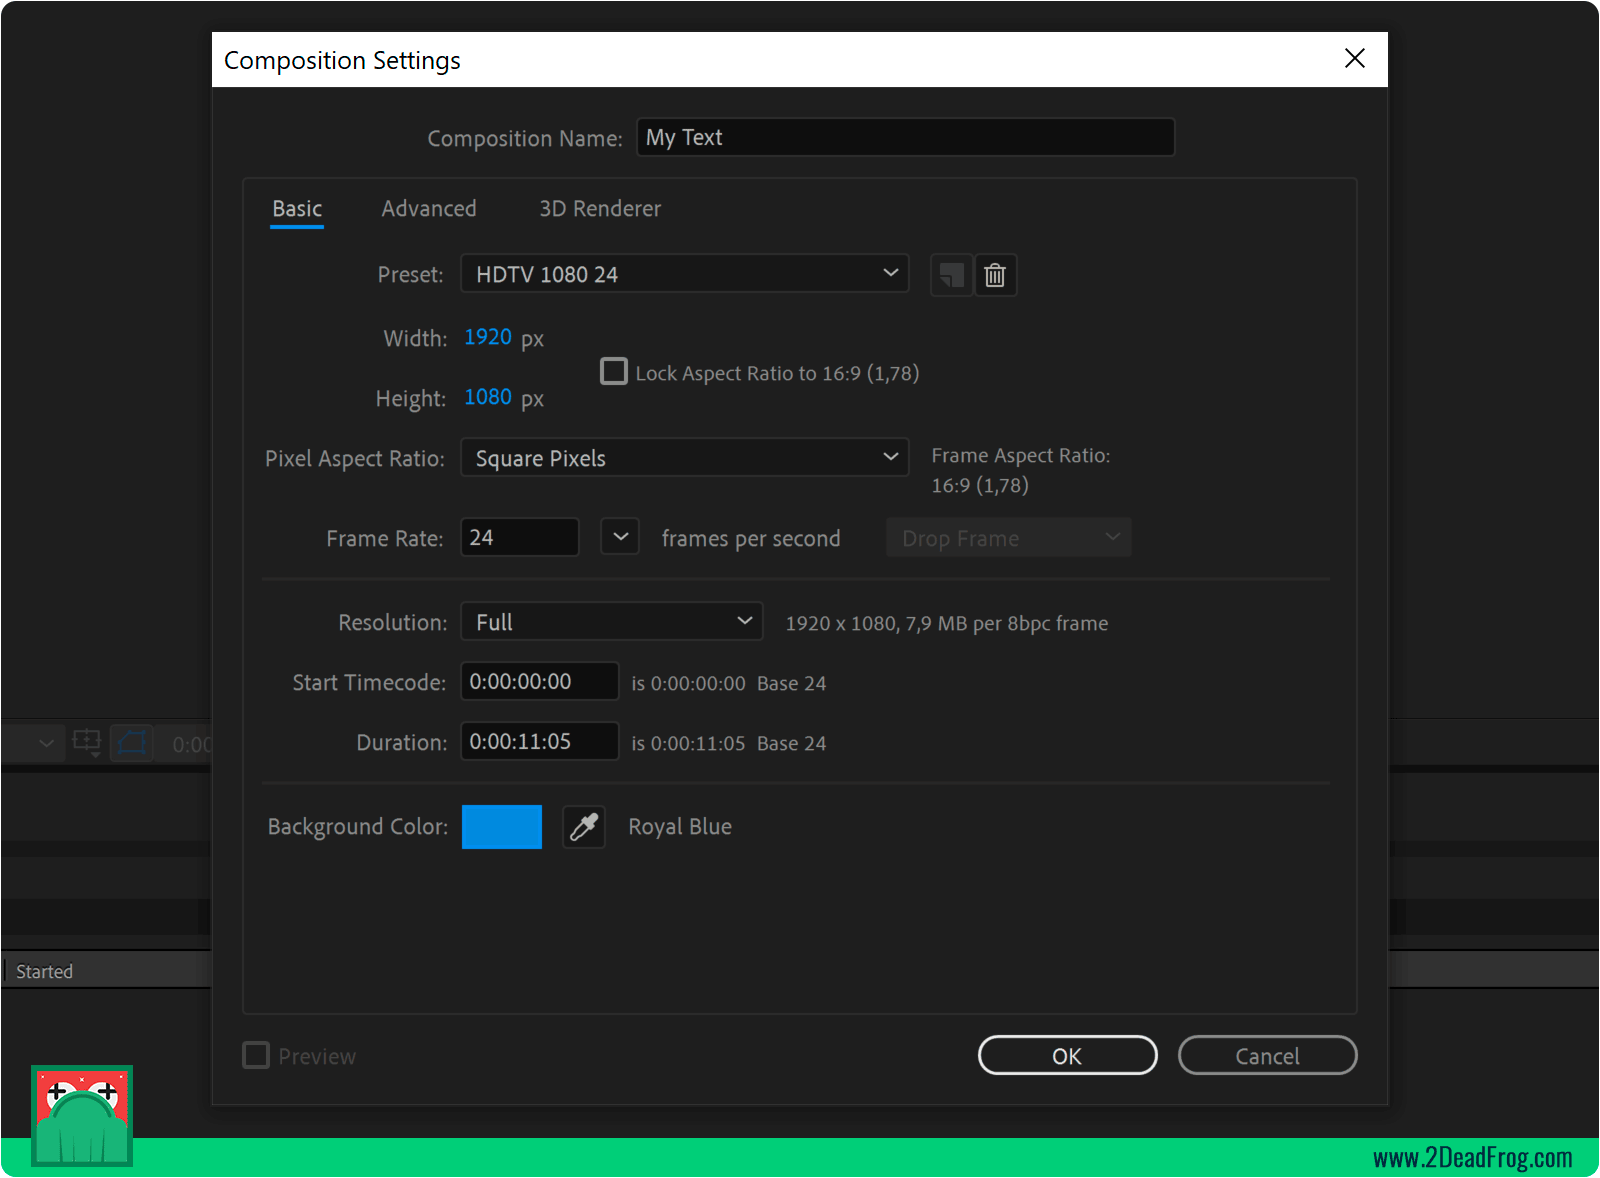
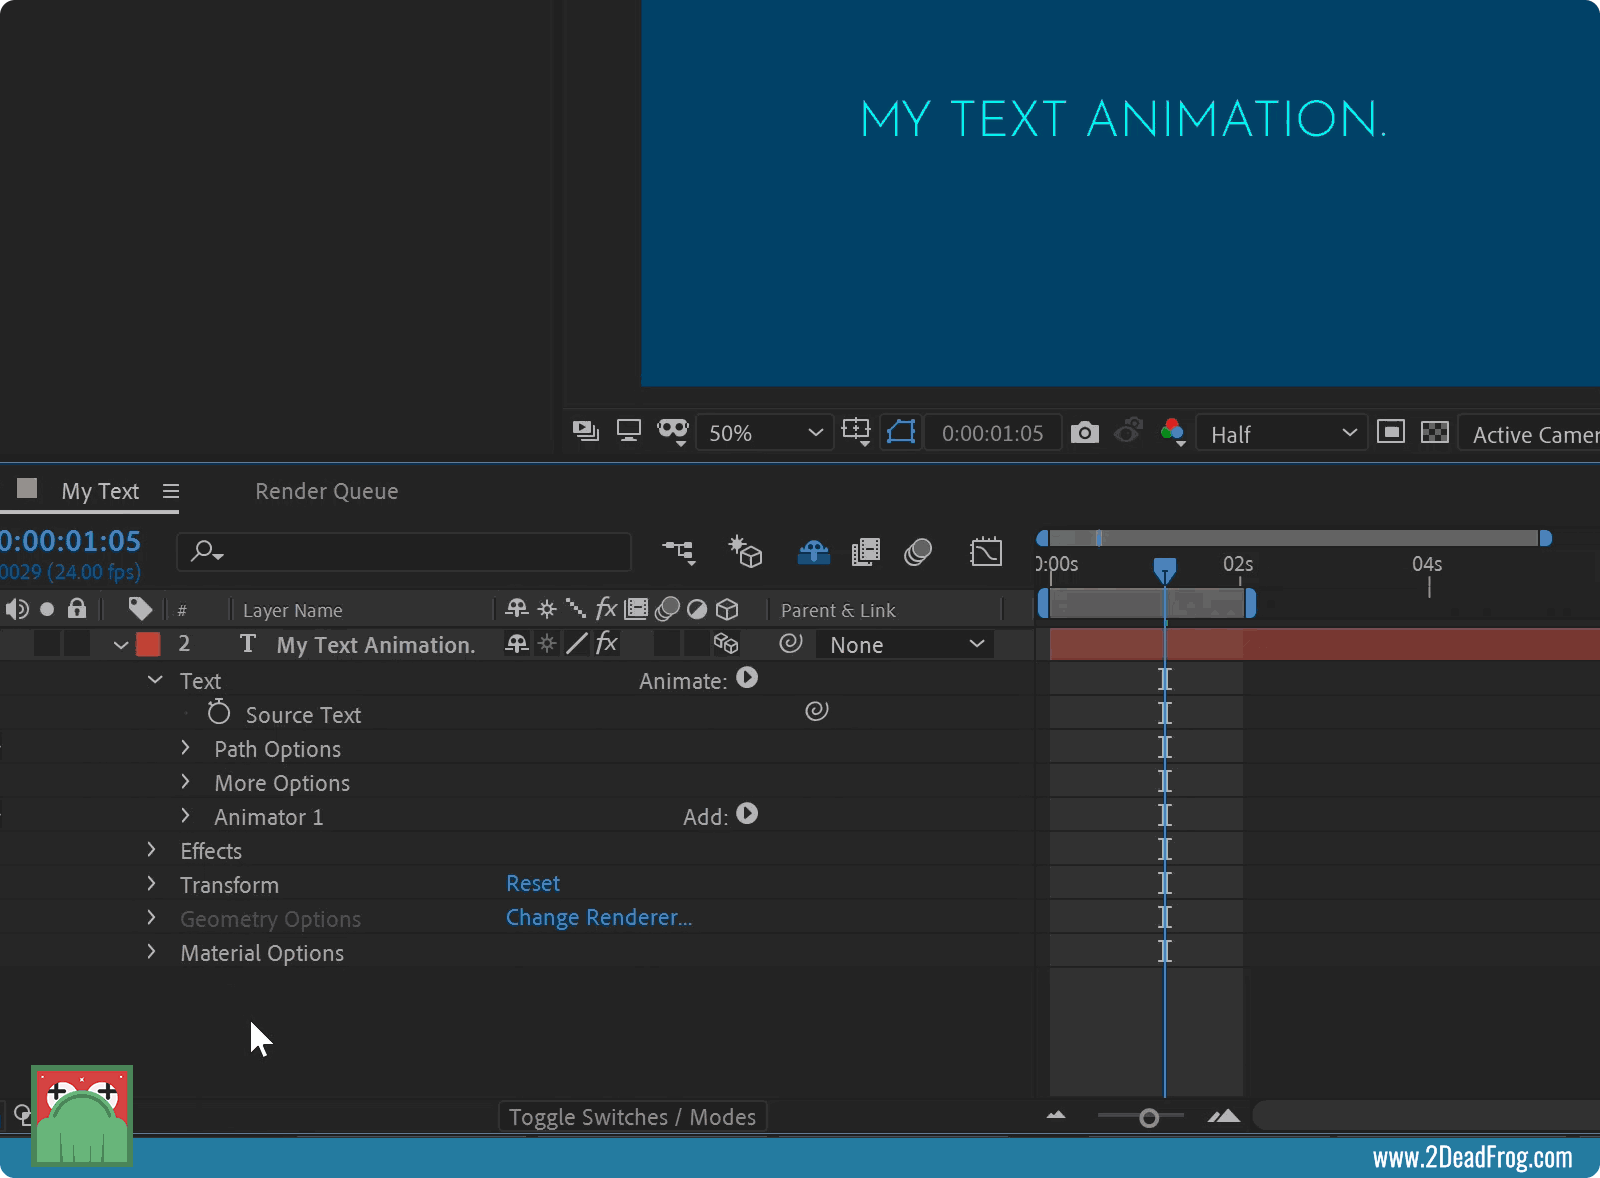
1. Create a 1920 x 1080 pixels composition, name it My Text.
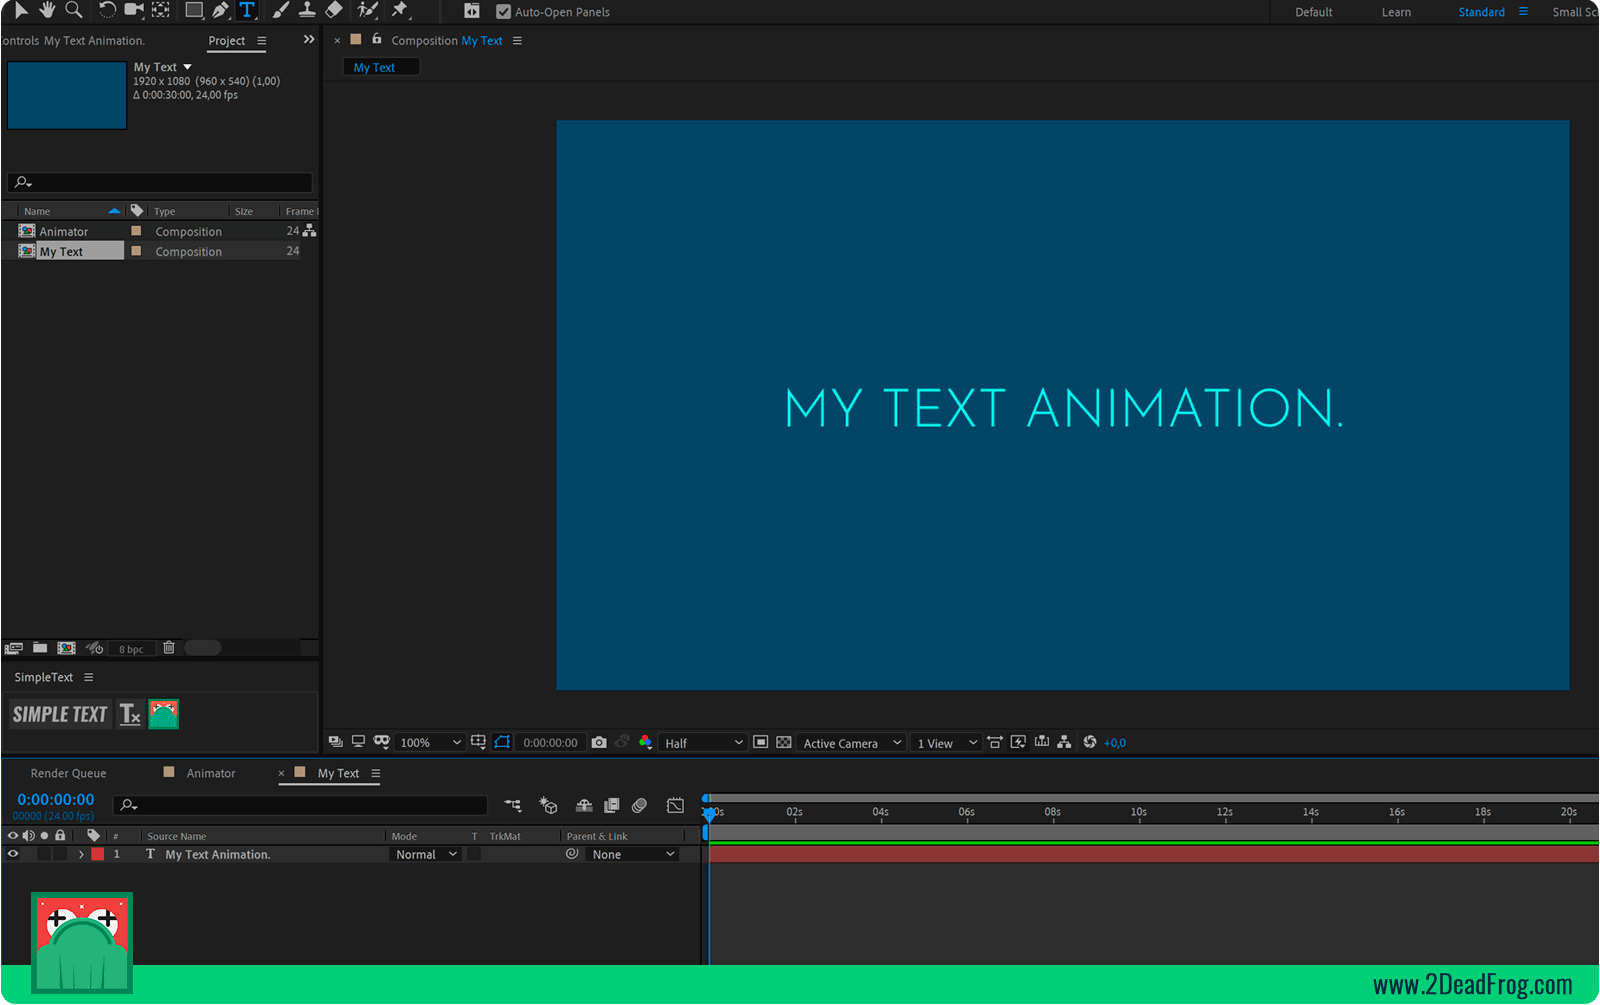
2. Create a text layer, in this tutorial I will use the text My Text Animation. You can use any text but start with a short sentence to be easier.
3. In the text properties, select Animate > All Transform Properties.
4. You have to enable the option Enable Per-character 3D as well, to make animations in the 3D environment of After Effects.
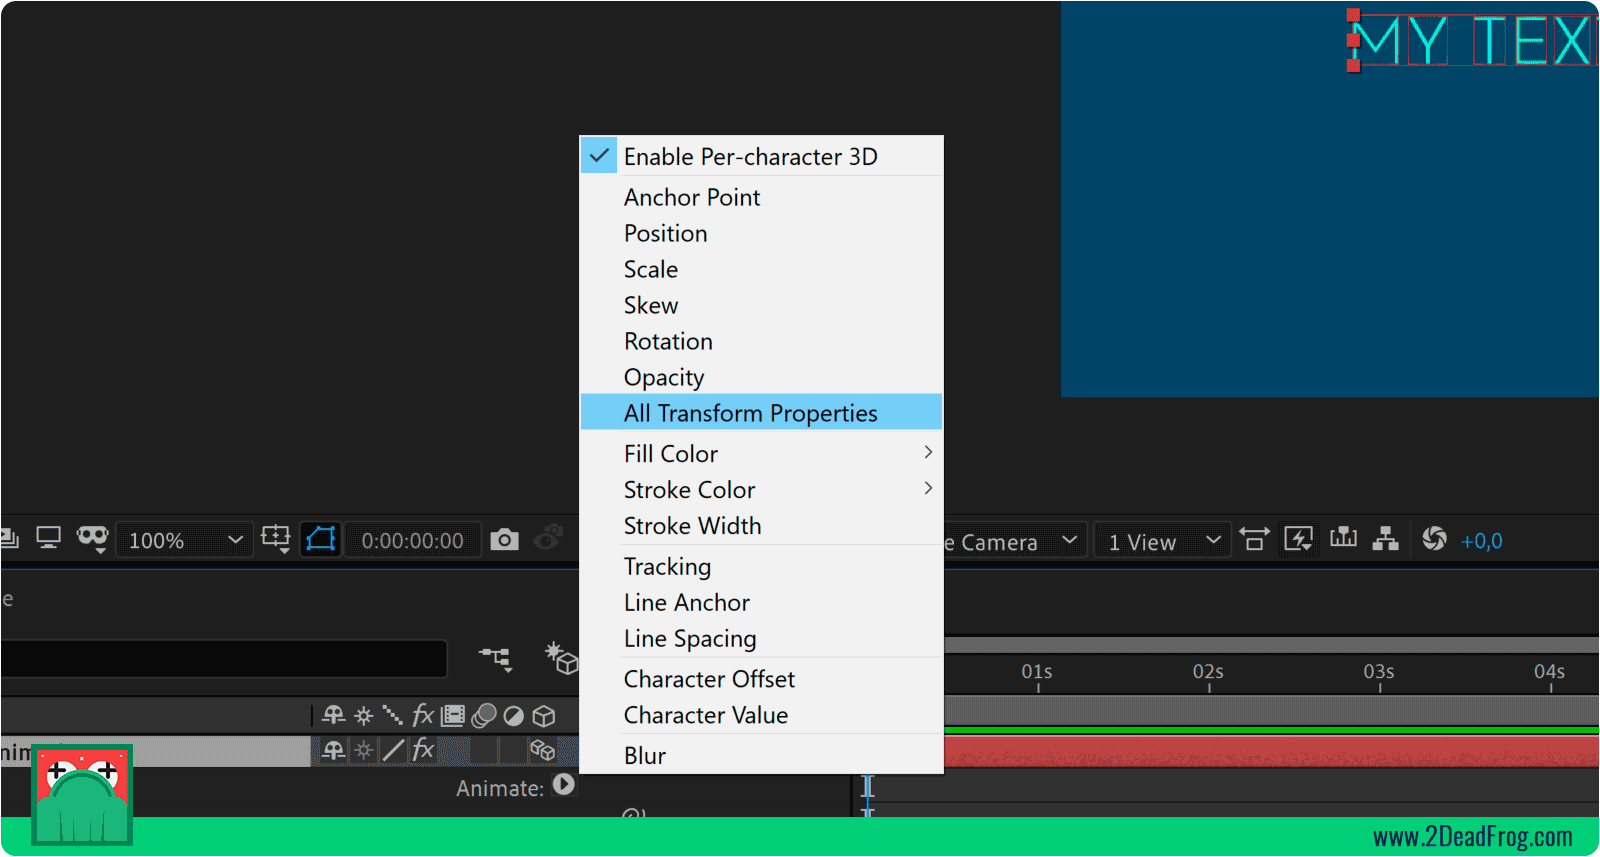
5. Inside More Options, set the Group Alignment parameter Y to -50% This will make the individual anchor point of each character to be right in the center.
Second step: Create the controller
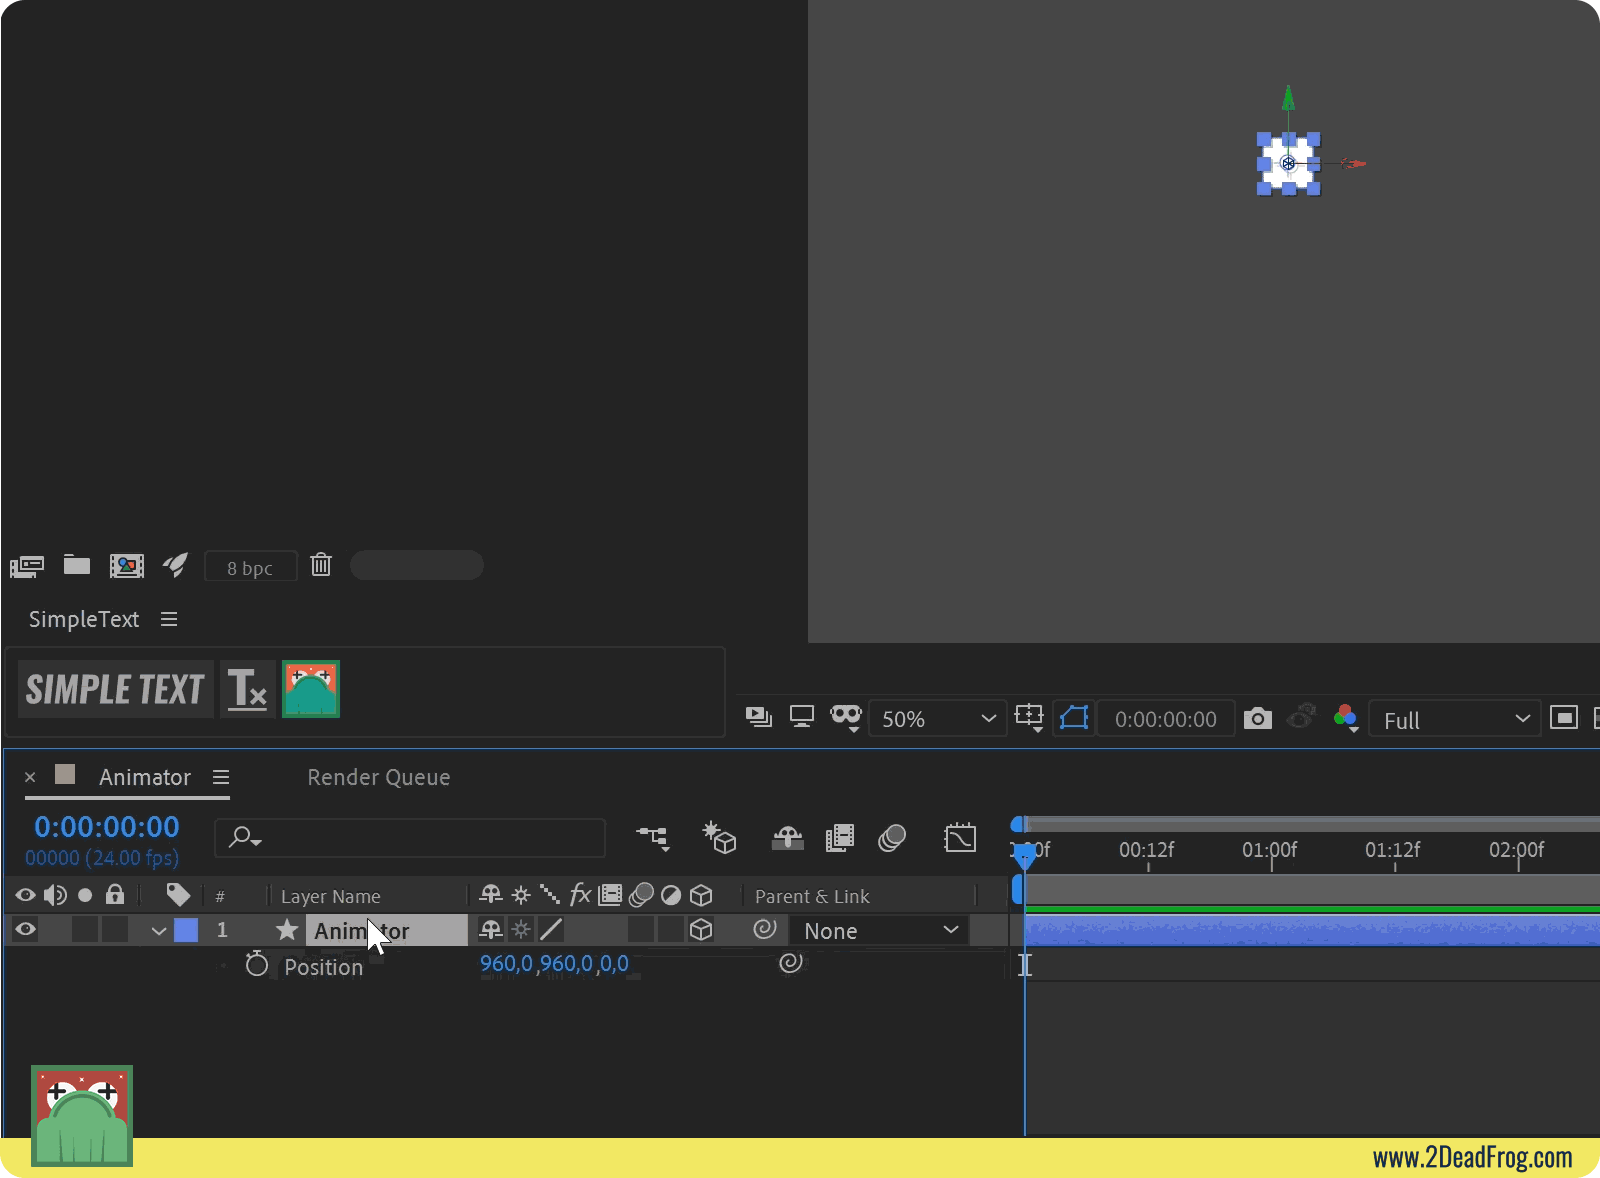
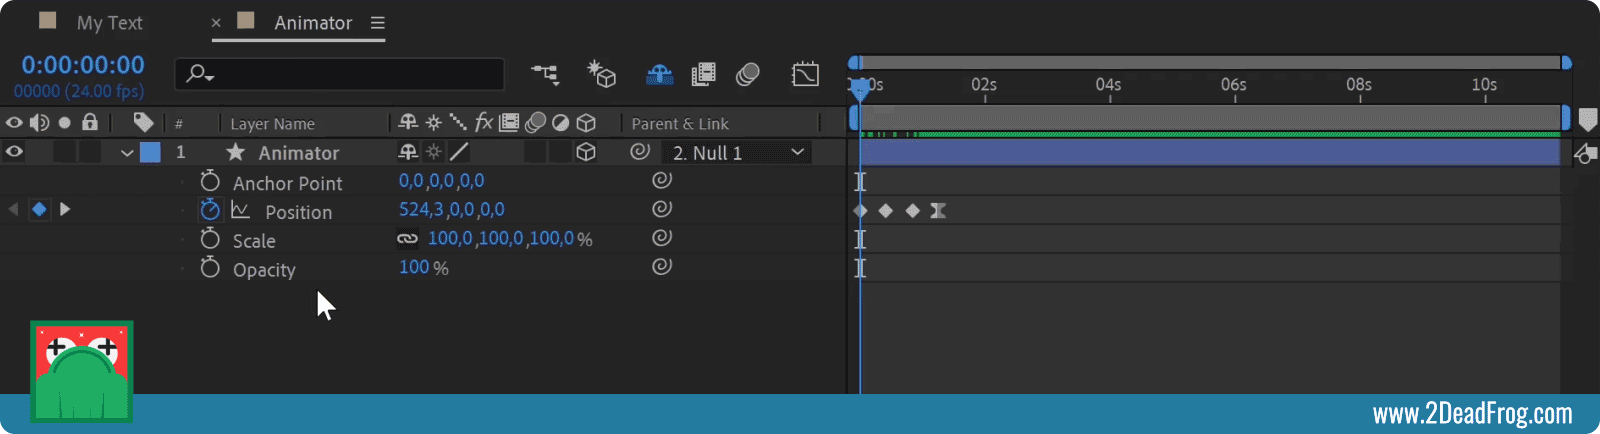
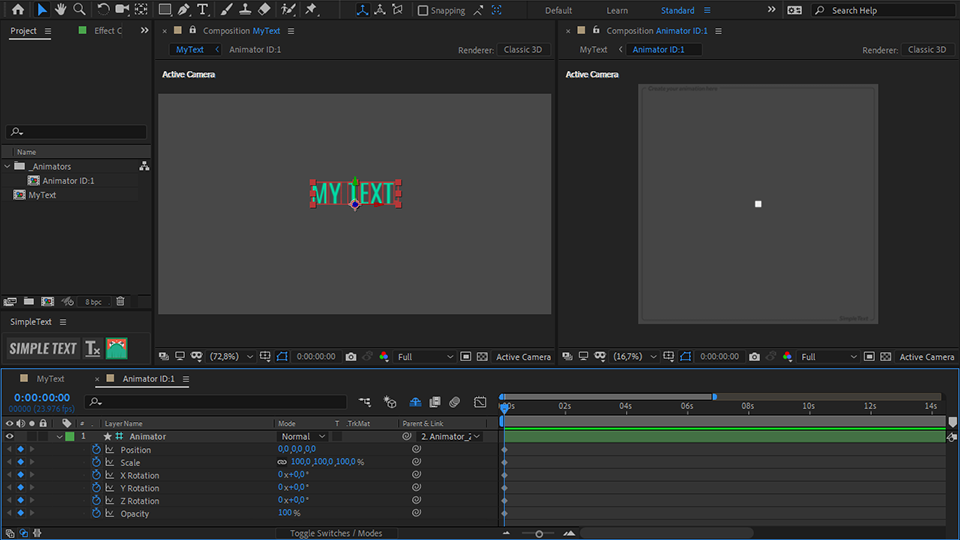
1. In After Effects, create a composition with 1920 x 1920 pixels. Let’s name it Animator.
2. We will now create the shape layer that we will use to transmit the animations to the text layer. Select the rectangle tool (Q) and click two times on it. This will create a rectangle with the exact size of the composition.
3. Select the layer created and press the U key twice quickly. Change the size of the created rectangle to 100 x 100 pixels. Use a color that contrasts sharply with the background. Name this layer Animator.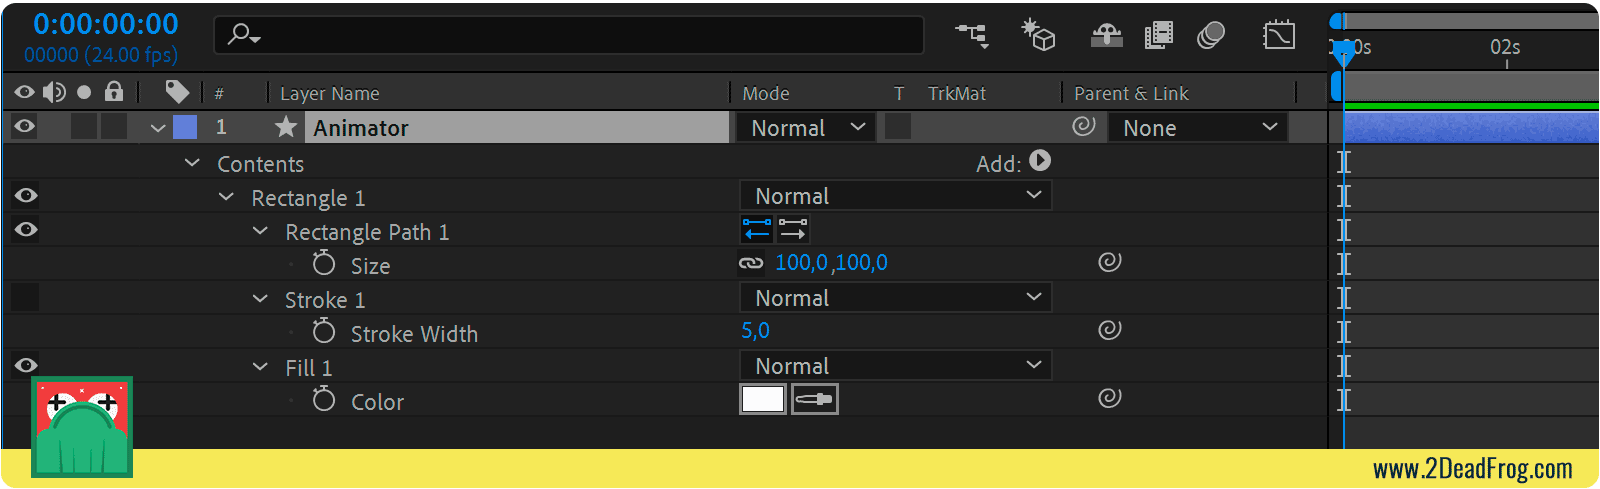
4. Enable this layer’s 3D option.
5. Note that when we added the animation properties in the previous step, the parameter Position appeared zeroed. Our task will be to connect our animator’s position parameter to the position parameter added in the text.
We will also need to reset the position parameter of our controller to simplify this connection.
To do this, create a null with the name Zero_Animator.
6. Parent the Animator layer to it. This will reset the position properties of your controller.
7. Lock, disable and hide the null using the Shy function, we will not need to see that null again.
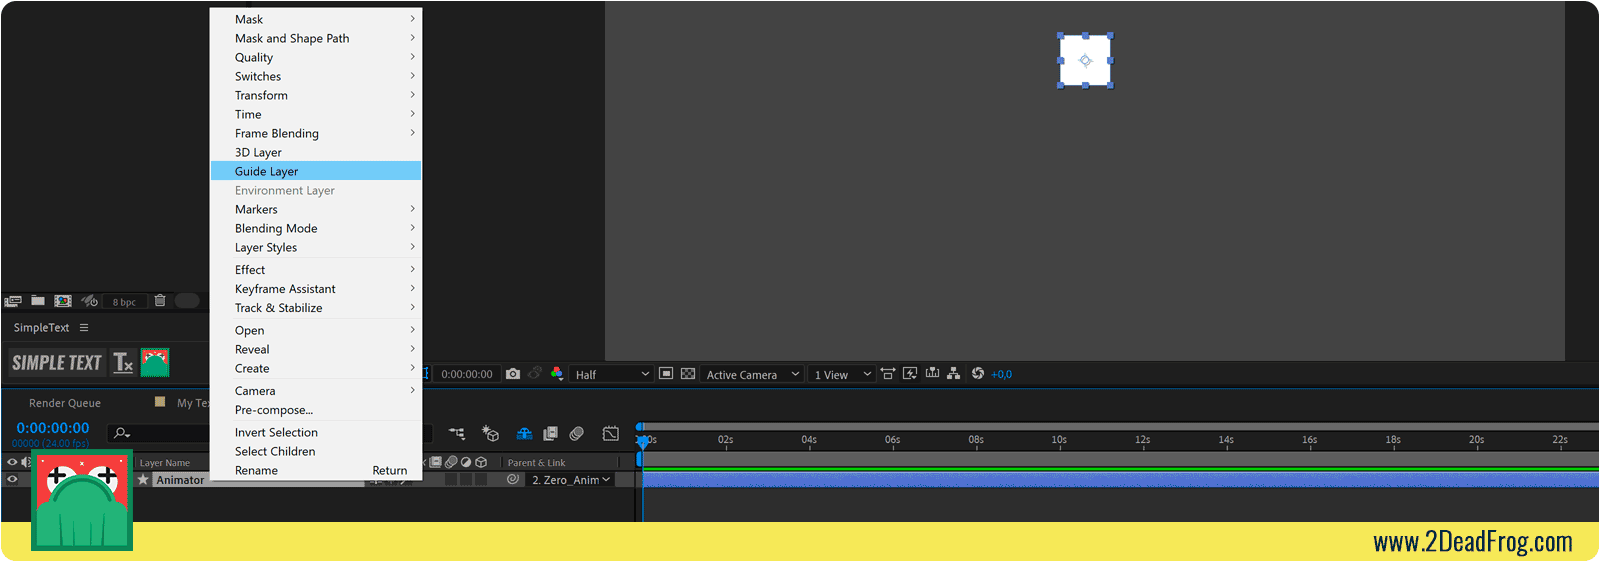
8. By right-clicking on the Animator layer, enable the Animator Guide Layer function, this will cause your layer not to be rendered, as it’s only a controller, it doesn’t need to exit at the final rendering.
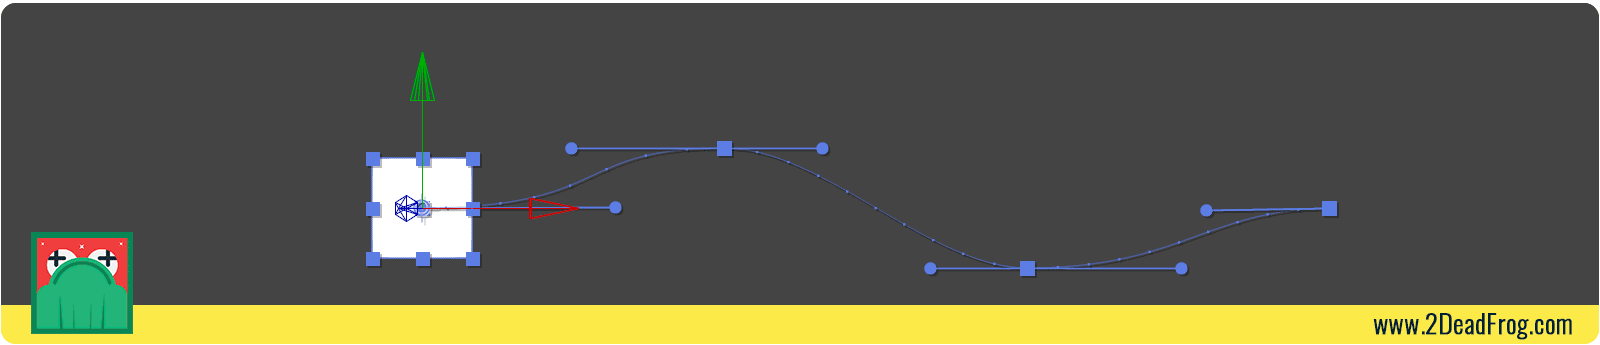
9. Create an animation using the transformation parameters, we will use this animation later to make sure that everything is working.
Third step: Creating the animator structure in the text layer
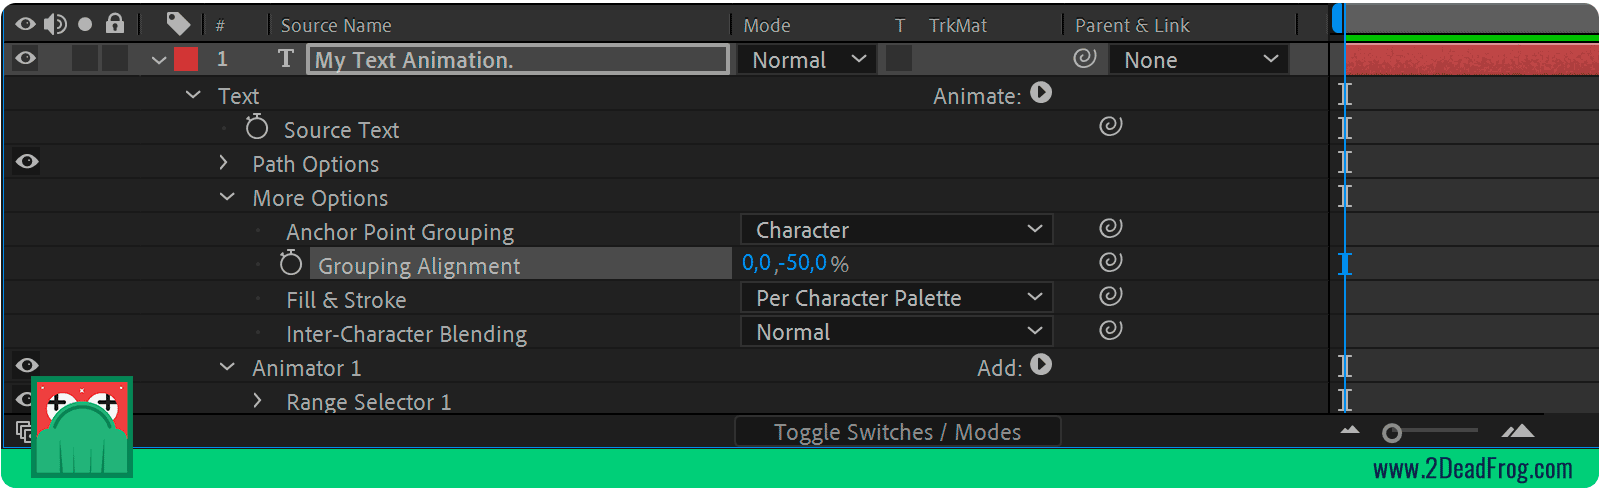
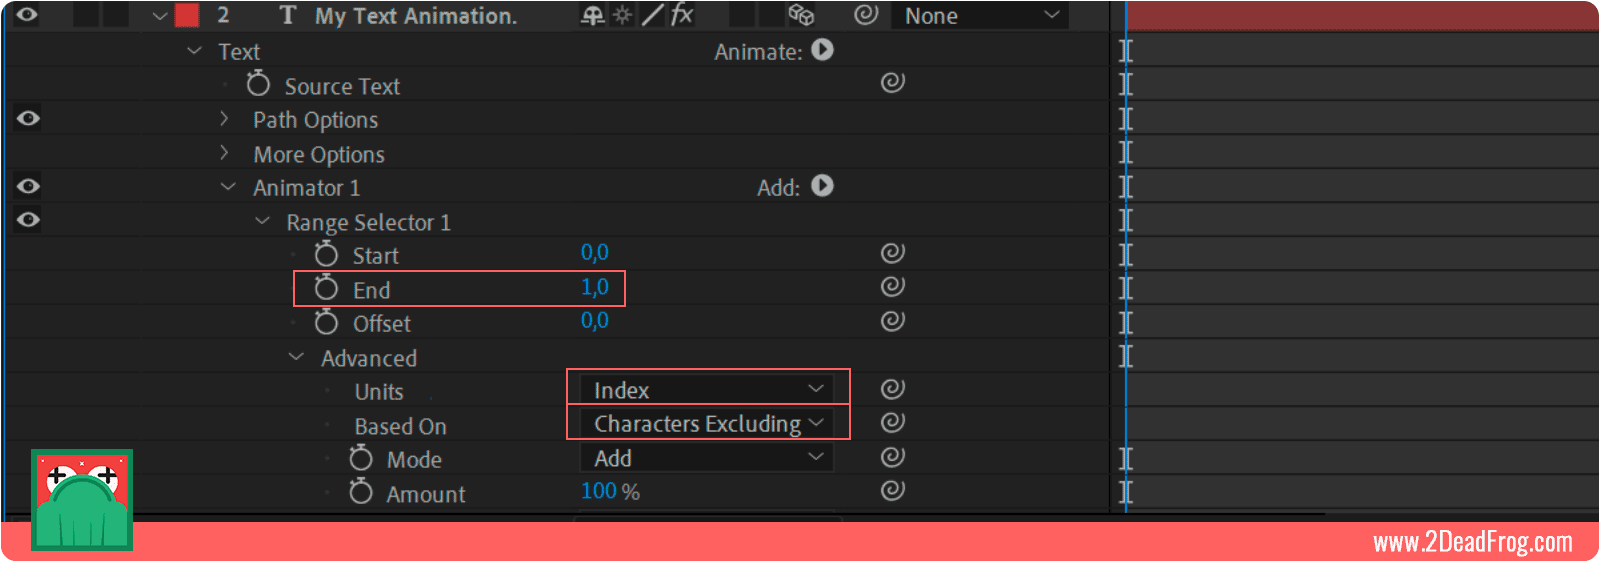
When we add the animation properties to our My Text Animation layer, After Effects automatically created Animator 1.
We need to adjust some parameters of this animator, as it will be the cornerstone for all the other animators we will use.
Practically speaking, we will create a unique animator for each letter, and we will create an expression for After Effects to automatically calculate which animator belongs to which letter.
1. In the advanced options of Range Selector 1 we will change the Based On to Characters Excluding Spaces.
2. Also in advanced options, change the unit to Index.
3. Set the Range Selector End parameter to 1.
4. If we needed to create each animator manually, we would keep the Offset parameter at 0 and increase one digit with each new letter. Nevertheless, I want After Effects to automatically calculate the Range Selector of each letter, so we’ll put the following expression in the Offset parameter.
thisProperty.propertyGroup(3).propertyIndex-1;
This expression uses the animator’s index to calculate the Offset. When we duplicate the animator, the Offset will no longer be zero and will be 1 instead.
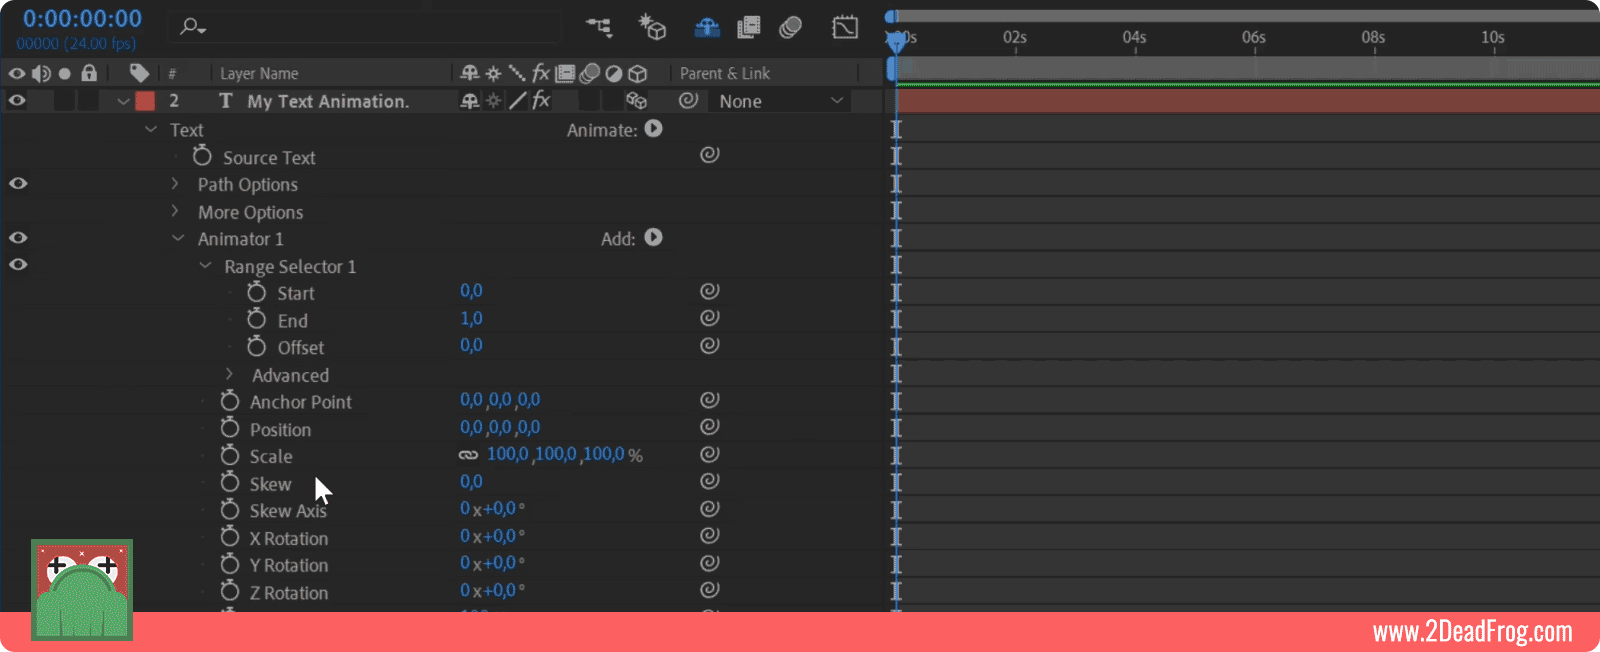
That way, each new animator will belong to the next letter. The propertyGroup() regressively accesses properties, in other words, depending on the number applied to this function (in our case, it was 3), it’s the number of properties that we’ll “put up”.
The propertyIndex returns the number corresponding to the current property. If, for instance, we had duplicated this animator 10 times, in the last parameter propertyIndex would return the number 10.
In this case, we use -1 because the offset must start at zero for the expression to work.
5. Create a Slider effect. We will use it to control the delay of entry of letters later. Rename the Slider to Delay.

FOURTH STEP: CONNECT THE CONTROLLER PARAMETERS TO THOSE OF THE TEXT ANIMATORS
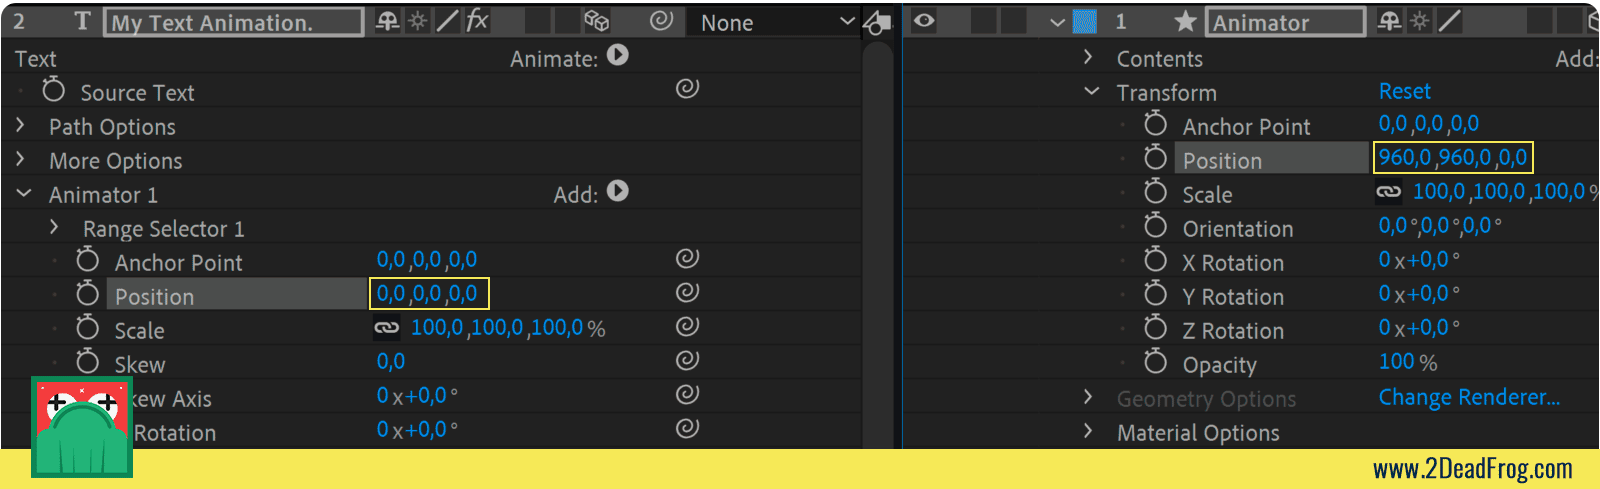
1. Drag the Animator timeline to the side, so you can see the MyText and Animator timelines at the same time.
2. Use the pick whip to connect the position parameter of the Animator layer to the position parameter of Animator 1 of the text layer.
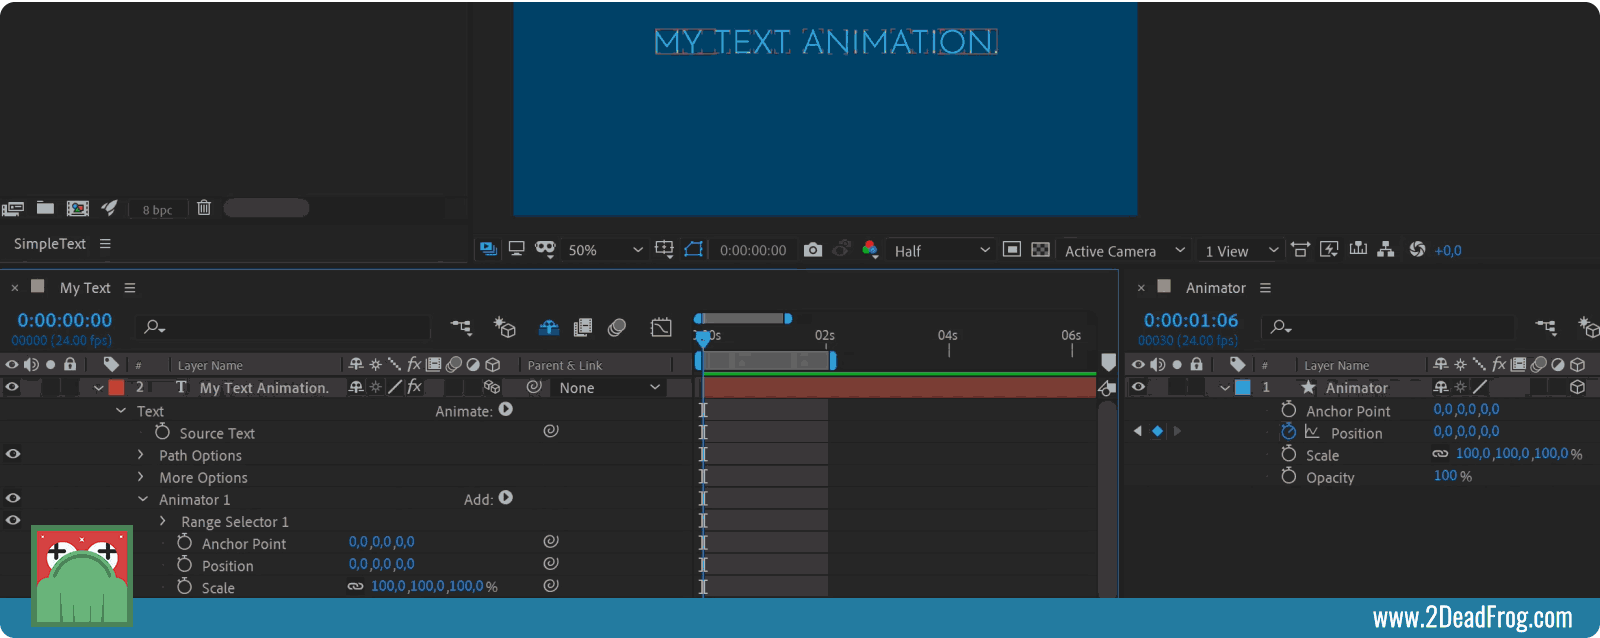
During this stage, you’ll already see that the animation you made on your controller is happening in your text’s first letter.
Let’s make the expression more versatile, taking into consideration the delay we plan to apply the other letters.
3. Click the arrow to access the expression created by After Effects when using the pick whip. Using it as a base, create two variables. sourceLayer and sourceParameter This will make our job easier when manipulating these parameters. The adapted expression looks like this:
var sourceLayer = comp("Animator").layer("Animator");
//This variable represents our controller’s layer.


var sourceParameter = sourceLayer.transform.position;
//This variable represents our controller’s position parameter
4. Add a new variable called delay. Use the pick whip to connect this variable to the Slider effect created earlier.
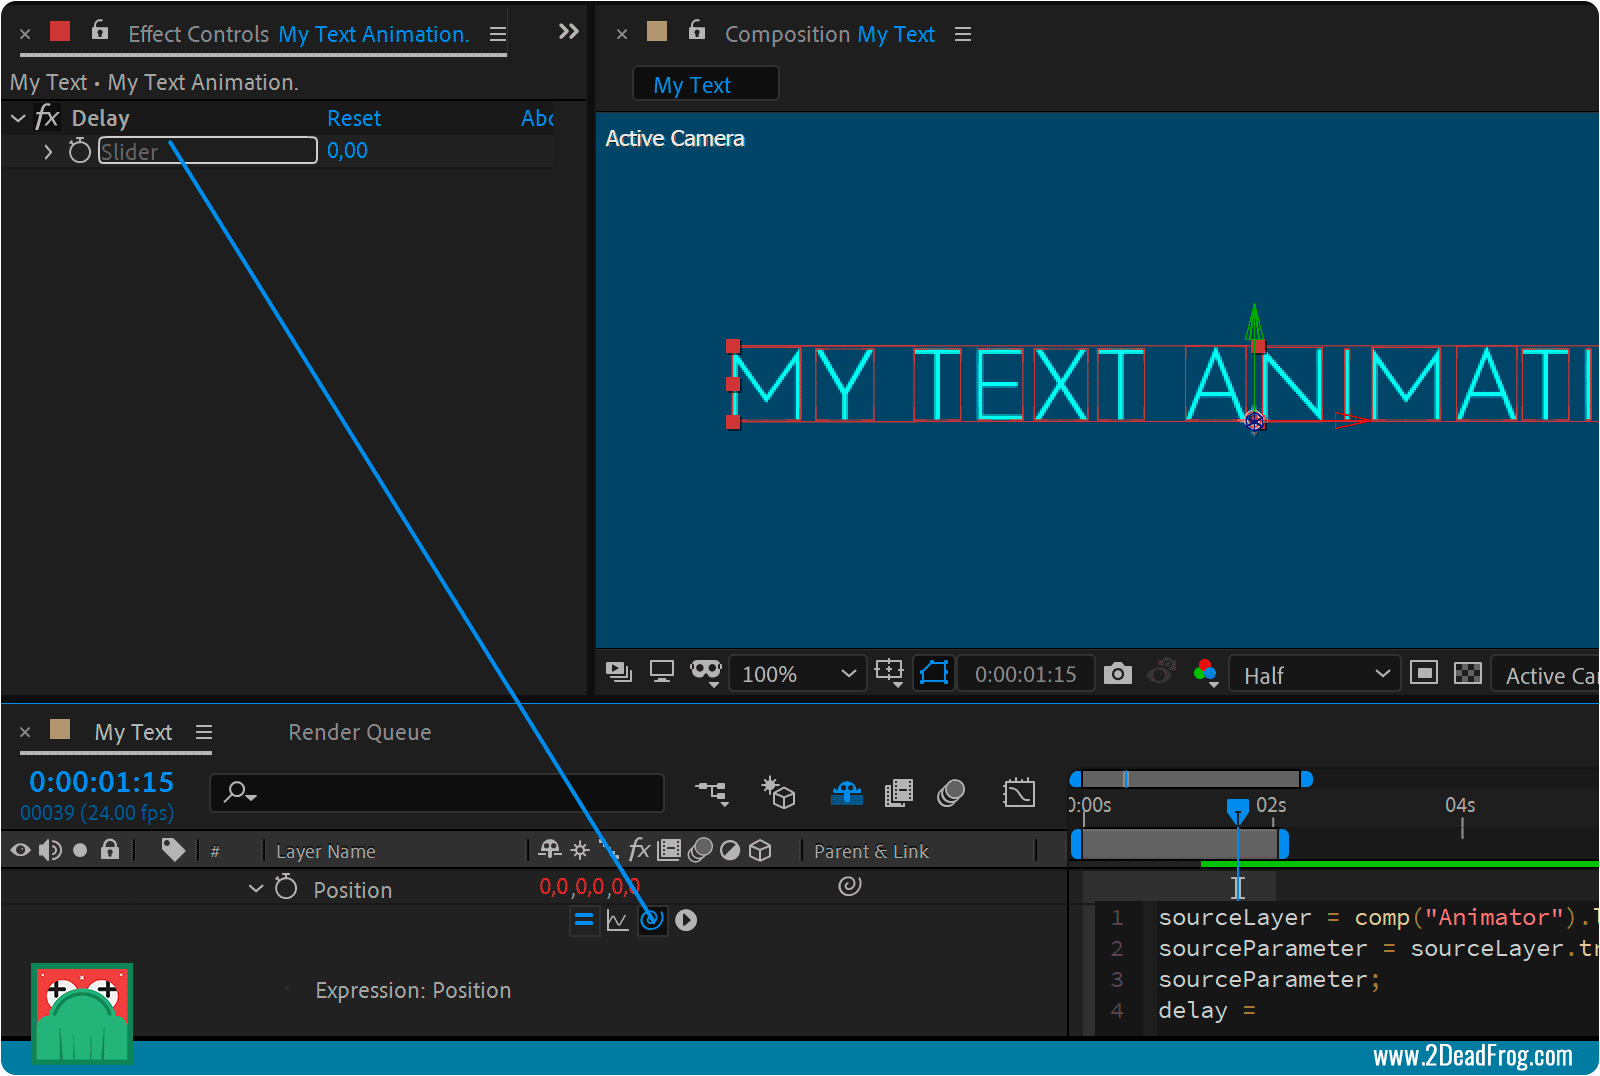
This part of the expression will look like this:
var delay = effect("Delay")("Slider");
Even though this code is not complete, you may have some expression error alerts shown by After Effects, but don’t worry about that now.
5. Create a new variable called currentLetter. We will use an expression similar to Offset above. The function is the same, identify the number that represents the current letter. This is our first letter, the expression will return the number 1. If it was the tenth letter, it would return the number 10.
var currentLetter = thisProperty.propertyGroup(2).propertyIndex-1;
6. We are now creating a variable called currentDelay. It will be the result of the multiplication of the slider Delay and the index of the current letter:
var currentDelay = currentLetter * delay;
7. This expression’s last line gathers all the variables we create. It takes the controller’s animated properties, and distributes in the text, taking into account the delay that must be applied between each letter. For that, we use the valueAtTime() function.
Inside the brackets, we ask to be considered the current time, minus the layer’s entry point, this makes the animation always start at the beginning of the layer, even if it’s not at the beginning of the composition.
Finally, the delay time is subtracted, according to the index of the corresponding letter. It’s a bit confusing, and sometimes I forget how I reached that logic.
sourceParameter.valueAtTime(time-inPoint-currentDelay);
That is the end result of the expression:
var sourceLayer = comp("Animator").layer("Animator");
var sourceParameter = sourceLayer.transform.position;
var delay = effect("Delay")("Slider");
var currentLetter = thisProperty.propertyGroup(2).propertyIndex-1;
var currentDelay = currentLetter * delay;
sourceParameter.valueAtTime(time-inPoint-currentDelay);

8. Now we can apply this expression to the other parameters, we just have to change the second line to the corresponding parameter:
Anchor Point: var sourceParameter = sourceLayer.transform.anchorPoint;
Scale: var sourceParameter = sourceLayer.transform.scale;
X Rotation: var sourceParameter = sourceLayer.transform.xRotation;
Y Rotation: var sourceParameter = sourceLayer.transform.yRotation;
Z Rotation: var sourceParameter = sourceLayer.transform.zRotation;
Opacity: var sourceParameter = sourceLayer.transform.opacity;
9. Our “animator master” has been created, it controls the first letter. Since it was dynamically created, to control the other letters, you just have to duplicate this animator as much as necessary to animate all the other letters.
10. By default, the Delay slider was created with the value zero. Change to the value you think best suited for your animation. In this case, I’m using 0,25. With this, every 1/4 of a second, one letter will be animated.
Your After Effects text animation solution is now up and running. Try different animations on the controller to see how the text reacts. Use speed curves in the Graph Editor, play with Bezier curves in the animated text path. These are simple things, but not easily accessible in the traditional After Effects text tool.
To reuse it, I suggest renaming the animator’s composition, and importing it into the project you’re working on. This makes it possible to work with multiple texts, each with its different animators. The possibilities are endless, and there are many ways to make this setup even more powerful.
GET TO KNOW SIMPLE TEXT
As I mentioned earlier, to make this process simple and automated, I developed a script that automatically creates this structure.
Simple Text is an evolution of this technique, with more options and easier to use, just one click to apply this animator structure to the text layer, being able to use different controllers and types of delay.
If you like the technique, and want to practically apply it in your workflow, consider using the script.
I believe that this technique has many benefits, depending on the type of work that you do, it can help you immensely in your daily life. Below you find its pros and cons:
Pros:
- Simple and intuitive text animations, as easy as animating a shape layer.
- The possibility to animate using acceleration curves and bezier in the motion paths.
- Most text solutions in After Effects often animate the text from point A to point B, with this solution it’s possible to create much more complex animations than that.
- Easier to change and adapt animations whenever needed.
Cons:
- There is a need for an animator for each letter. If the text is too long, it can get too heavy to render.
- Text layers depend on an external composition to be animated.
- If you want to change the Based On to words or lines, you need to redo this process.
TRY AND SHARE YOUR IMPRESSIONS
And you, what did you think of this technique? Do you see any other positive or negative points in its use? Comment, share, contribute with your ideas. I’m curious to know what you thought of this way of doing text animation in After Effects. As promised, I’m now making available this project to be downloaded, I’m at your disposal if you have any doubts!